How to Draw the USAF Insignia Star and Bars

How do you draw the USAF insignia?
Turns out it easier than it looks. With a simple understanding of geometry and drafting you'll have a "to scale" United States Air Force Star and Bars Roundel drawn up in no time.
Just follow theses rules below, step by step.
But first, what designates the overall size and dimensions of a USAF Roundel?
The answer is it depends on the aircraft. There are different sizes per plane, although one standard always remains the same: the diameter of the star. This factor determines the proper size of the aircraft insignia. Each manufacturer designated specific sizes for both the fuselage and wings. Don't make the mistake of presuming that they are both the same. (Chances are they are not!)
Luckily, you can find the proper roundel sizing in Aircraft Markings, Camouflage, or Insignia Installation Drawings for the specific model of aircraft that you are working on. A great place to find this information for a variety of aircraft including the P-51 Mustang, T-6 Texan, P-47 Thunderbolt, L-5 Sentinel, B-17 Bomber, B-25 Bomber and many more... is AirCorps Library.
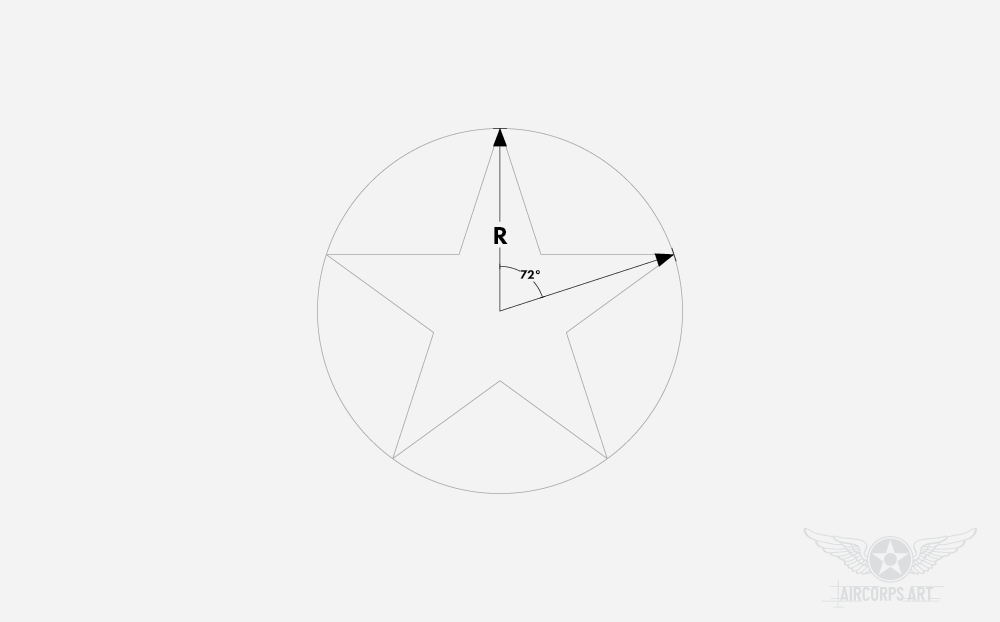
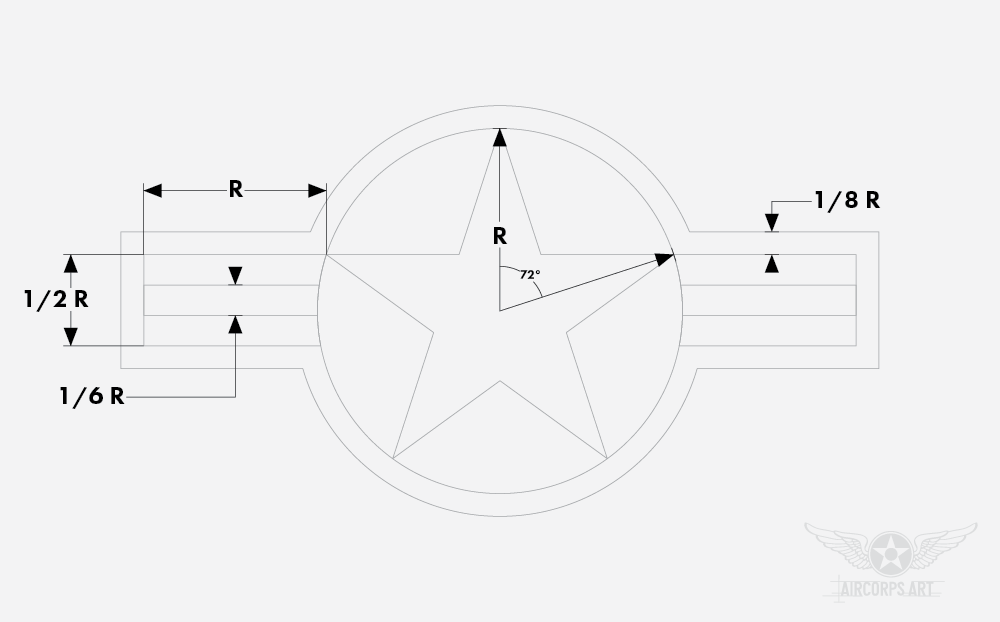
Once you find the diameter if the insignia, calculate the radius by dividing the dimeter by 2 (R=D/2). This is the number that you will need to complete the insignia detailed in the slides below. To begin, use the Radius to draw a circle with a five (5) point star. Each point of the star lands at 72° degrees along the circumference of the circle staring at 0° degrees.
This is the most important step to starting off the roundel. Effectively at this point, you have drawn US Insignia Specification Number 24102-K (Amend #3). This used on aircraft put in service from May 28th, 1942 to June 29th, 1943. You can check out more information on types of roundels detailed in our Insignia Timeline.
Step 1: Use the Radius to draw a circle and a symmetrical five-point star. Each star point is spaced by 72° along the circumference of the circle.
Step 2: Draw bars (1) one radius long by 1/2 radius high in parallel on the star shoulders, staring from the outermost points. 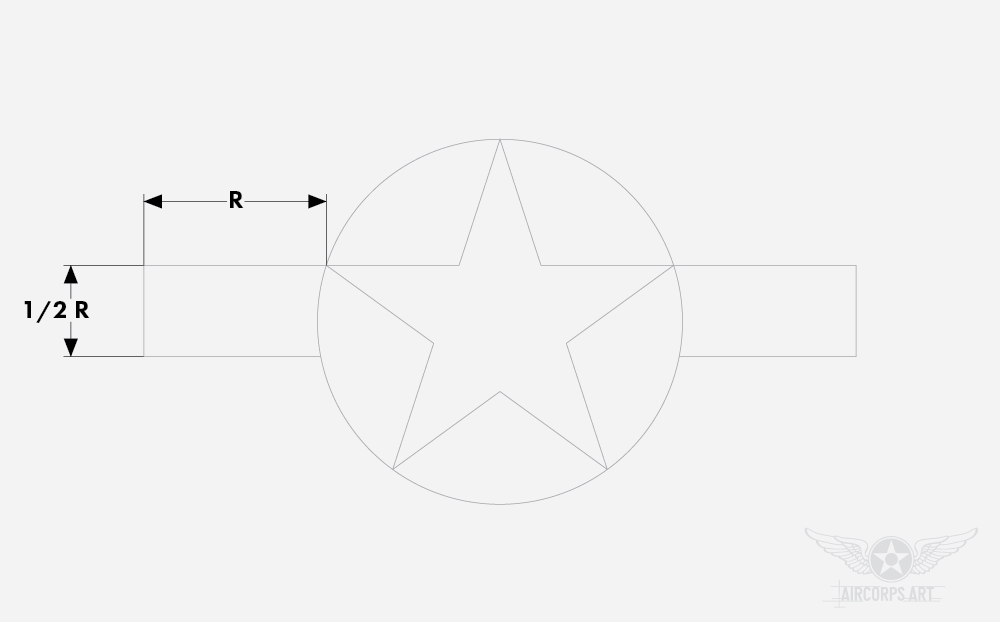
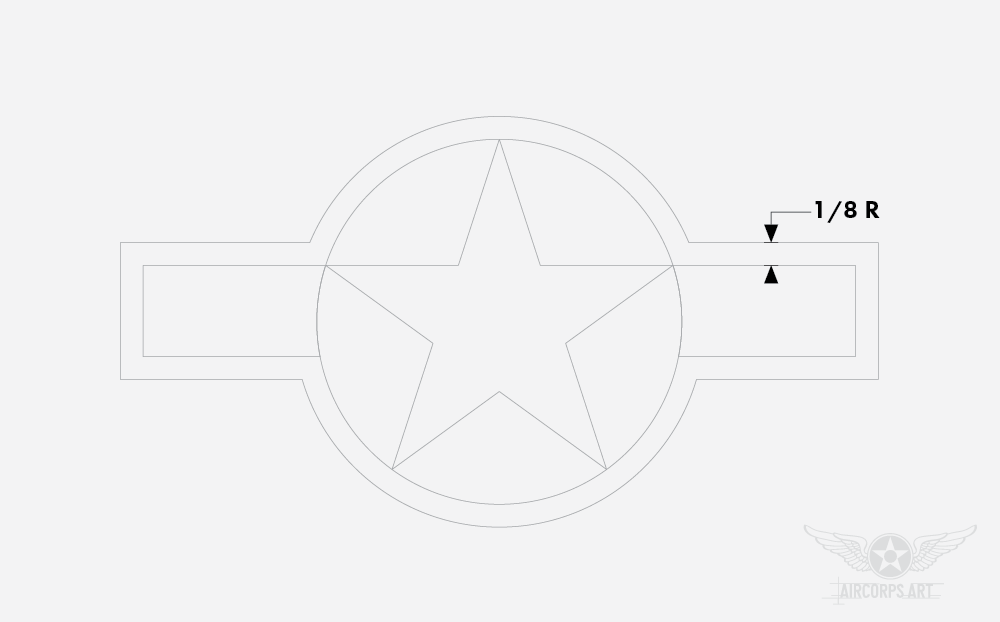
Step 3: Draw a border 1/8 Radius thick around the circle and bars.
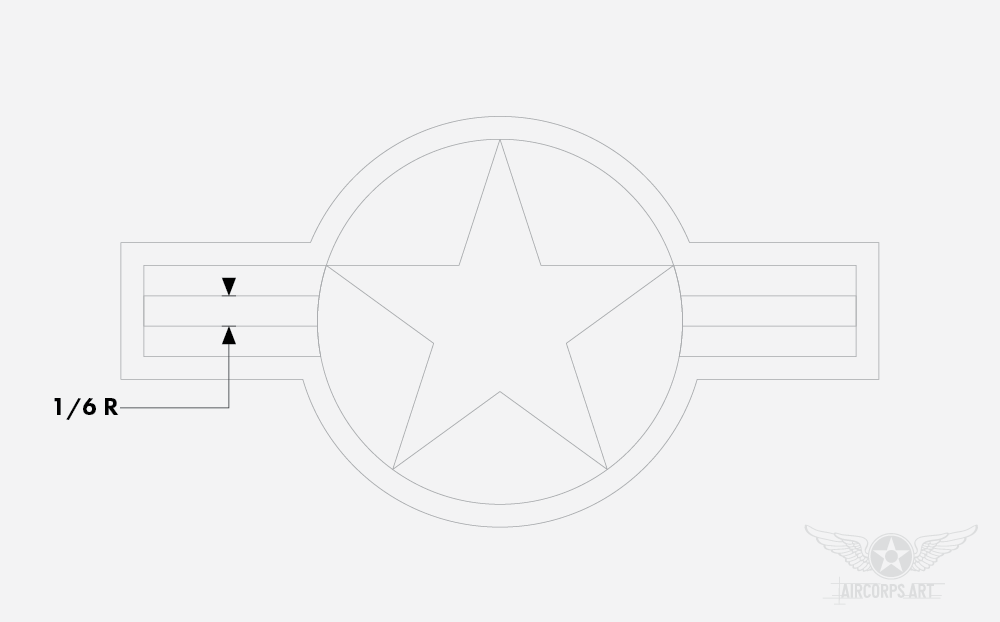
Step 4: Depending on your roundel design, there may be a red or white band within the center of the bars. Draw this band 1/6 Radius high, centered in the bars.
And that's it. Now you have the basic shape for a US Airforce National Insignia Roundel. Make sure to check out our color code blog if you need more info on WWII Color Codes.
---

Have a project where you need a USAF Insignia Roundel for your next aircraft or model project? Check out our DECALS PAGE page for a large variety of nations and styles available!